Now that you have downloaded April Update on your computer, it’s time to dive deeper into the features offered by the latest update. One of the coolestWindows 10 August 2025 Update featuresis the Timeline, which was expected to arrive alongside the disruptive feature called Sets. Apparently, Microsoft saved the latter for Redstone 5.
What is Windows 10 Timeline?
Timeline, which has been the talk of the town ever since it was showcased in the Insider builds, can be of great help formultitaskersand people who use different devices on a daily basis. Windows Timeline can be found in Task View. It can be used to manage your current tasks/desktops as well as get to know about tasks on connected phones as well.
An average user could have a computer, a smartphone, and possibly an iPad if they don’t have Apple allergy. So, syncing the work between them it a tedious task in itself even when one has a blazing fast internet connectivity and a plethora of cloud services at hand. Windows 10 Timeline automates the syncing part and adds to the cross-device experience.
How to use Windows 10 Timeline feature?
Timeline in Windows 10 PC shares a common home with the virtual desktop feature. To use Timeline, click theTask Viewbutton in the taskbar, the activities from various apps and devices will populate in a reverse chronological. However, you just installed the April Update, so won’t see much until a couple of days of usage.
You can also open the Timeline on Windows 10 using theWindows + Tabkeyboard shortcut or by making athree-finger scroll (upwards)on the touchpad.
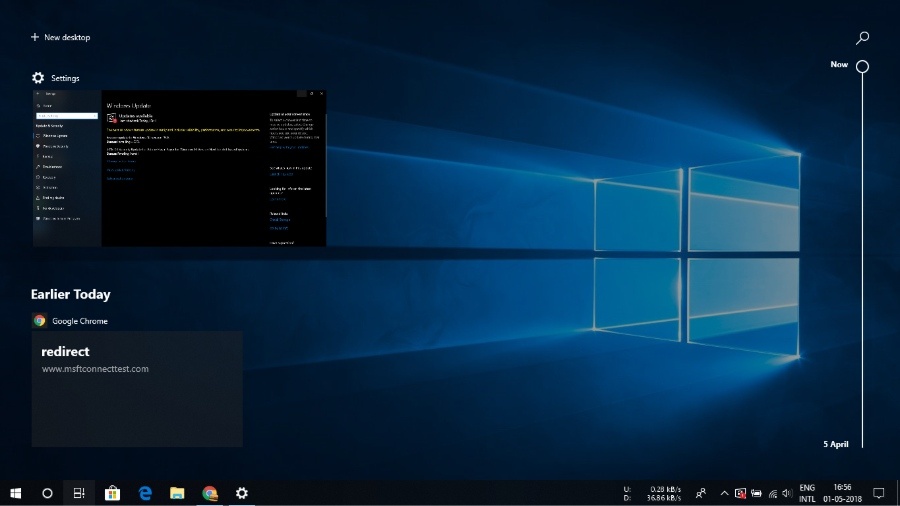
The thumbnails displayed in the Timeline are called Activities. You can click any one of them to resume stuff. For instance, if you watched a YouTube video a couple of days ago, an Activity can take you back to the web page. Similarly, it offers an easy way to get back to your documents and emails you often forget to follow up. You can start writing an article in MS Word on your computer and use your tablet for proof-reading.
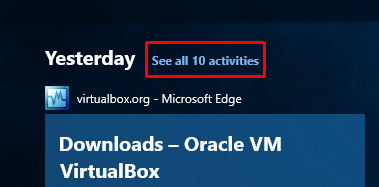
The Timeline on Windows 10 can show Activities that are up to 30 days old. As you scroll down, you may see the activities from previous dates. The activities are grouped by a day, and by an hour if a day has too many of them. To access timeline activities for an hour, clickSee all activitiesnext to a date. To go back to the main interface, clickSee only top activities.
How to delete a Timeline Activity?
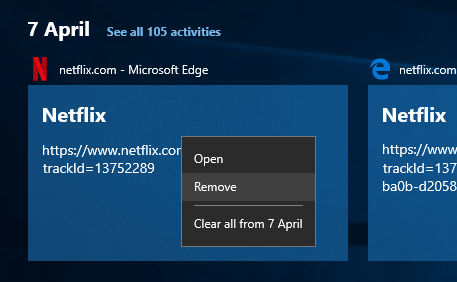
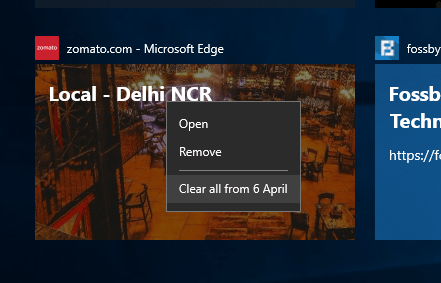
You can easily remove an activity from the Timeline. Just right-click on the activity you want to delete and clickRemove.
Similarly, you can remove all the activities from a particular day by clickingClear all from .
Search activities in the Timeline
In the top-right corner of the Timeline interface, you’ll see a search option that saves the scrolling effort and lets you find activities quickly. For instance, if you type the name of an app, all the activities related to the app will be displayed.
If you binge-watched Netflix or checked out a restaurant a few days ago, type the name to the Netflix title or the website directly into the search bar. So, you can search for apps, documents, web pages, images, videos, etc.
Cortana can help you with Timeline
The number of things that Cortana can’t do in Windows 10 is decreasing every day. With the April 2018 Update running on your system, Cortana can help you get more out of the Windows 10 Timeline. The digital assistant can suggest the activities that you might want to resume.
More settings related to Timeline
Stop suggestions
If you want to stop activities from appearing in the Timeline, go toSettings > System > Multitasking. Here, turn off the “Show suggestions occasionally in Timeline” toggle button under Timeline.
Disable Windows 10 Timeline
It goes without saying that Timeline is fueled by Microsoft’s cloud to throw on activities on devices. You can disable the cloud sync if you want. Go toSettings > Privacy > Activity History. Here, untick the following checkboxes:
Next, on the same page, turn off the toggle button for the Microsoft accounts for which you want to hide the Timeline activities.
How to use Windows 10 Timeline on Android and iOS?
Microsoft designed the Timeline to make your cross-device experience better. So, how can they leave behind Android and iOS devices which took away Redmond’s smartphone dreams?
To use Timeline on Android or iOS devices, you need to download Edge browser (Google Play,App Store) and use the same Microsoft account. Using this feature needs a lot of confidence by letting people see their mobile browsing history on their PC.
An option called “Share browsing history with Microsoft” should be enabled inSettings > Privacy.
So, this is how you’re able to use Windows 10 Timeline feature on your computer. Once people get the hang of it and Microsft improves its support on non-Windows devices, it could improve productivity. Timeline would further become better with the arrival of Sets in Windows 10.
What are your views on Windows 10 Timeline? Drop them in the comments below.
